
Today we are going to discuss how to make FBA and SBA adjustment on the Odette pattern. These adjustments specifically add or subtract width in the bust area. You may need this adjustment if the shoulder/neck area fits fine, but your bust area is too small or too big.
Before we start slicing up our pattern, let's talk about how to calculate your personal bust adjustment. My go to method for determining this is to do a little tissue fitting over a T-shirt. You might want to mark your CF on the T-shirt with a pin. I usually eyeball what seems to be the center point between my breasts.
- For a full bust adjustment, take your front bodice pattern piece and lay it on the front of your body. You'll want to position the pattern so that the side seam is over top the T-shirt side seam. Now look to see how far away the CF of the pattern is from your real CF. Measure this amount and record it as your Full bust adjustment. You will be adding this amount to the pattern.
Now that you know how much you need to add or subtract to the pattern, let's get out our tools and start cutting.
-Items needed: A traced copy of the front bodice, extra paper, scissors, tape, ruler, flexible tape measure, pen/pencil. I strongly suggest using traced copies of the pattern because we will be cutting the pattern apart.
Full Bust Adjustment
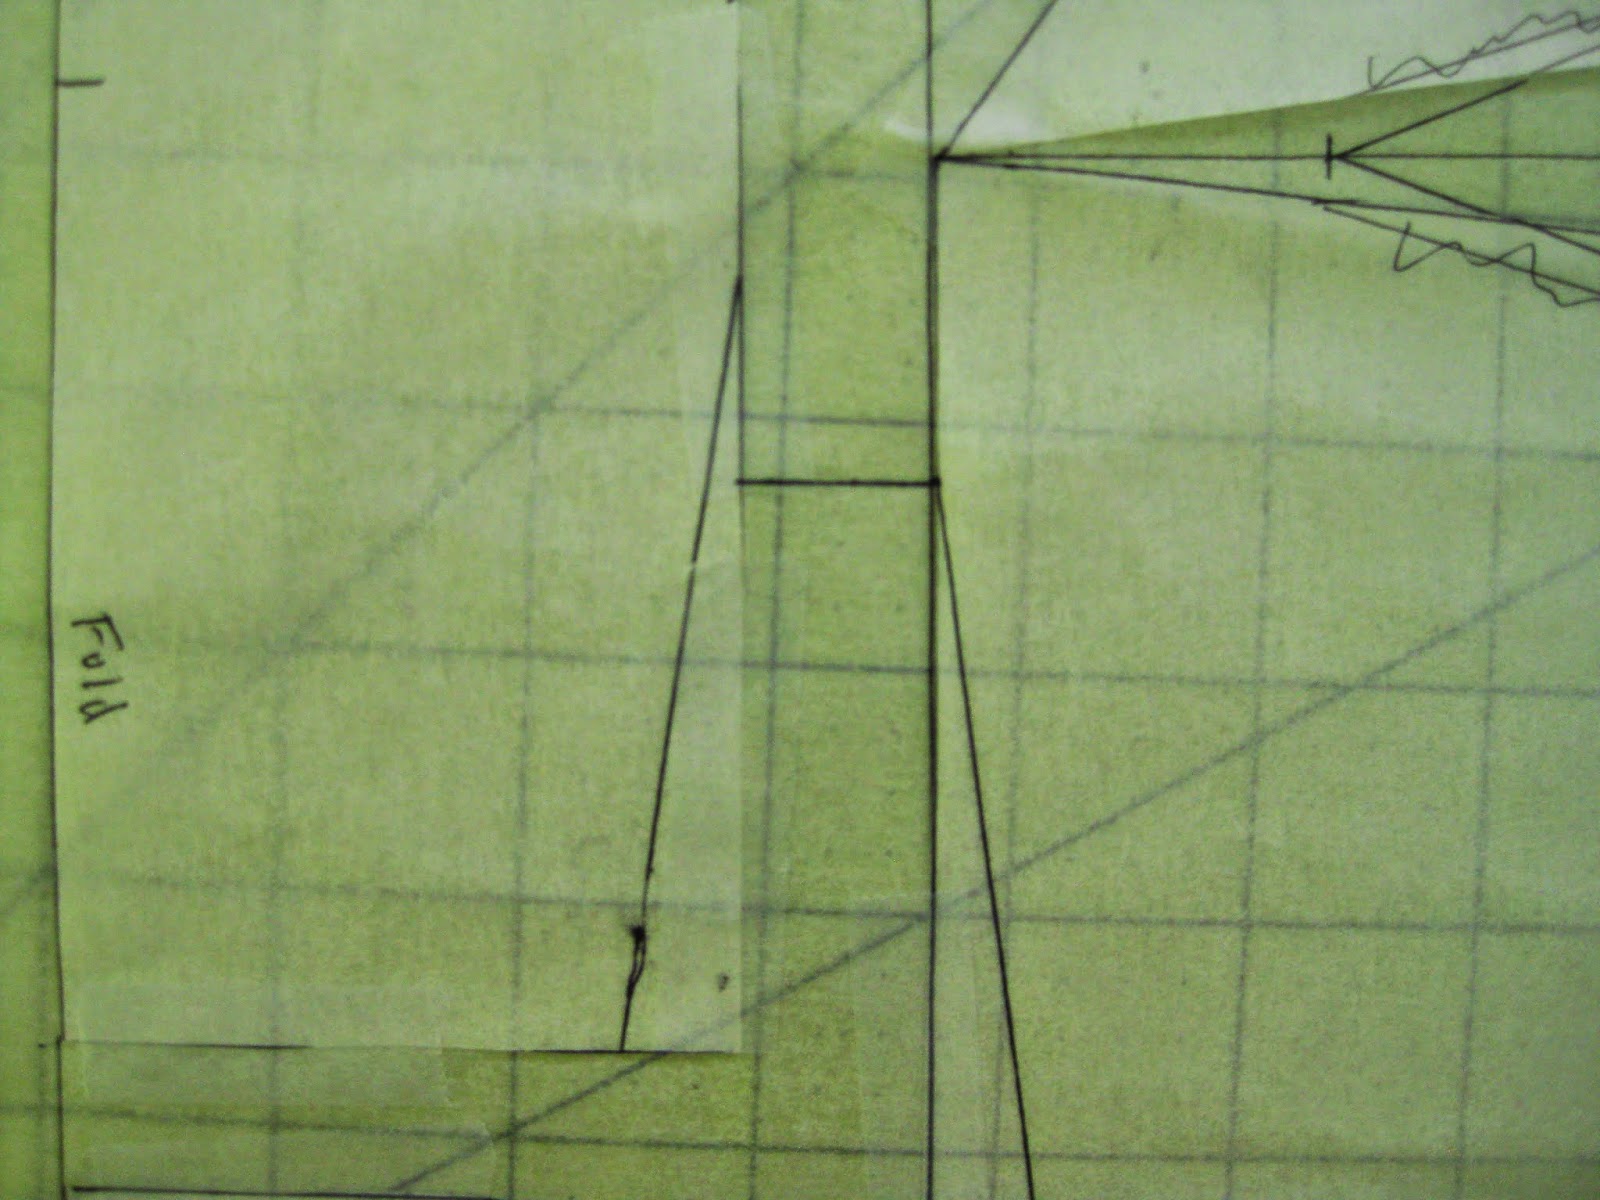
Step 1 - Find the center of the side seam dart and draw a line through the dart point, out over the top of the waist dart.

Step 2 - Find the center of the waist dart and draw a line through the dart point, up to meet the previously drawn line. Where the two lines intersect is the apex point.

Step 3 - From the armhole notch, draw a third line to meet a the apex point

Step 4 - At the armhole edge mark in the 5/8" seam allowance so you know where to put the "hinge" during cutting.

Step 5 - Your front bodice should now look like this. We will begin cutting it apart to make the bust adjustment.

Step 6 - From the bottom of the waist dart, cut on the center line up through to the armhole seam allowance mark. Stop there.

Step 7 - From the armhole side snip the paper just a bit to create a "hinge" for adjusting the pattern.

Step 8 - From the edge of the side seam dart, cut through almost to the apex point. Leave a small paper "hinge" here as well. The pattern should now look like this.

Step 9 - Place some scrap paper underneath the pattern. Tape down the left side of the waist dart area.

Step 10 - The waist dart is the location where the extra bust width will be added. To do this take the amount calculated at the start of this post and measure it out from the left side of the dart. In this example I'll be adding 3/4" to the pattern.

Step 11 - Slowly pull the pattern out and down to the right. Do this until the other cut edge of waist dart touches the parallel line. Make sure the rest of the pattern is as flat as possible and tape down all the cut edges.

Step 12 - One the side seam dart find the new center and draw in a new dart tip. Then redraw the dart legs and the dart intake.

Step 13 - In the waist dart area draw a horizontal line anywhere below the apex area.

Step 14 - Cut the pattern apart on this line. Reposition the bottom edge of the front so that it lines up with the right side dart leg. Tape in place.

Step 15 - Use the right side/lower side as the location to draw the new point for this dart.
Step 16 - Find the center of the new waist dart and mark it.

Step 17 - Redraw the draw legs and the dart intake.

Step 18 - Cut off all the excess paper to complete the Full Bust Adjustment.

Small Bust Adjustment
Step 1 - Find the center of the side seam dart and draw a line through the dart point, out over the top of the waist dart.
Step 2 - Find the center of the waist dart and draw a line through the dart point, up to meet the previously drawn line. Where the two lines intersect is the apex point.
Step 3 - From the armhole notch, draw a third line to meet a the apex point
Step 4 - At the armhole edge mark in the 5/8" seam allowance so you know where to put the "hinge" during cutting.
Step 5 - Your front bodice should now look like this. We will begin cutting it apart to make the bust adjustment.
Step 6 - From the bottom of the waist dart, cut on the center line up through to the armhole seam allowance mark. Stop there.
Step 7 - From the armhole side snip the paper just a bit to create a "hinge" for adjusting the pattern.
Step 8 - From the edge of the side seam dart, cut through almost to the apex point. Leave a small paper "hinge" here as well. The pattern should now look like this.
Step 9 - The waist dart is the location where the extra bust width will be subtracted. To do this take the amount calculated at the start of this post and measure the distance from the left leg of the dart. Mark the distance towards the CF side of the pattern. In this example I'll be removing 3/4" from the pattern.

Step 10 - Move the right side of the pattern so that it overlaps the left side. Move the pieces until the cut edge on right side of the waist dart meets the newly drawn vertical line. Keep all the pieces flat as possible and tape them down when they are in position.

Step 11 - In the waist dart area draw a horizontal line anywhere below the apex area.

Step 12 - Fold the left hand edge of the pattern up until it meets the right hand side edge. Tape in place.

Step 13 - Use the right hand side as your reference point for the point of the waist dart. Redraw the legs to the new point.

Step 14 - Place a little paper under the edge of the dart and fold it closed.

Step 15 - Cut off the excess paper. Open the dart and it will now have the proper dart intake.

Step 16 - Draw the side seam dart legs and repeat the last two steps to get the proper dart intake.

Step 17 - Fill in the notch at the armhole area and then your Small Bust Adjustment will be complete.

If you have any questions on FBA/SBA or other fitting issues please head over to the Facebook sew-a-long group. www.facebook.com/groups/bluegingerdollsewalongs
Happy sewing - Heather
No comments
Post a Comment
Thank you so much for the visit and leaving a comment!
I totally appreciate them all!
Happy sewing!
Abby
x