
In today's post I'll be detailing how to install an invisible zipper. The new pattern release The Betsy pencil skirt has two variations ( View A & View C) that call for an invisible zipper to be installed but this is also a great skill to have in your sewing arsenal. Don't worry about the bad rap that invisible zippers seem to have. Sewing one in goes smoothly as long as you do a little preparation beforehand.
The tools you'll need are, an invisible zipper that matches your fabric, zipper foot and/or invisible zipper foot, fusible interfacing, pins and matching thread. If you do not own an invisible zipper foot don't worry. I'll be showing you how to get similar results with your regular zipper foot.
 Before starting, make sure the seam edges being attached to the zipper have been finished. If you are installing the zipper on a garment with a waist band, grade any seams that the zipper crosses and then press seam allowances up into the waistband.
 You can install zippers with the CB sewn or with it left unsewn. Chose which ever technique is easier for you.
Step 1 - Fuse strips of interfacing to the wrong side of the garment where the zipper will be inserted. The fusible web will keep the fabric from stretching out of shape while you are sewing. Hand cutting 1/2" strips will does the job well. You can also buy a roll of pre-cut interfacing for tasks such as this.

Step 2 - We will be basting the zipper into position first. Place the closed zipper face down on the right side of the fabric. Check that the zipper is positioned at the correct seam allowance. Then pin into place. Tip - Butting the zipper tape up to the overlocked edge usually gives a perfect 5/8" seam allowance.

Step 3 - Install a regular zipper foot on your machine and set your machine to a basting stitch. Baste down the pinned side of the zipper tape.

Step 4 - Turn the garment inside out to prepare for sewing the other side of the zipper. Again, place the zipper face down on the right side of the fabric. Measure the correct seam allowance and pin into place. If a seam needs to be matched, then run a line of basting only over the seam area.
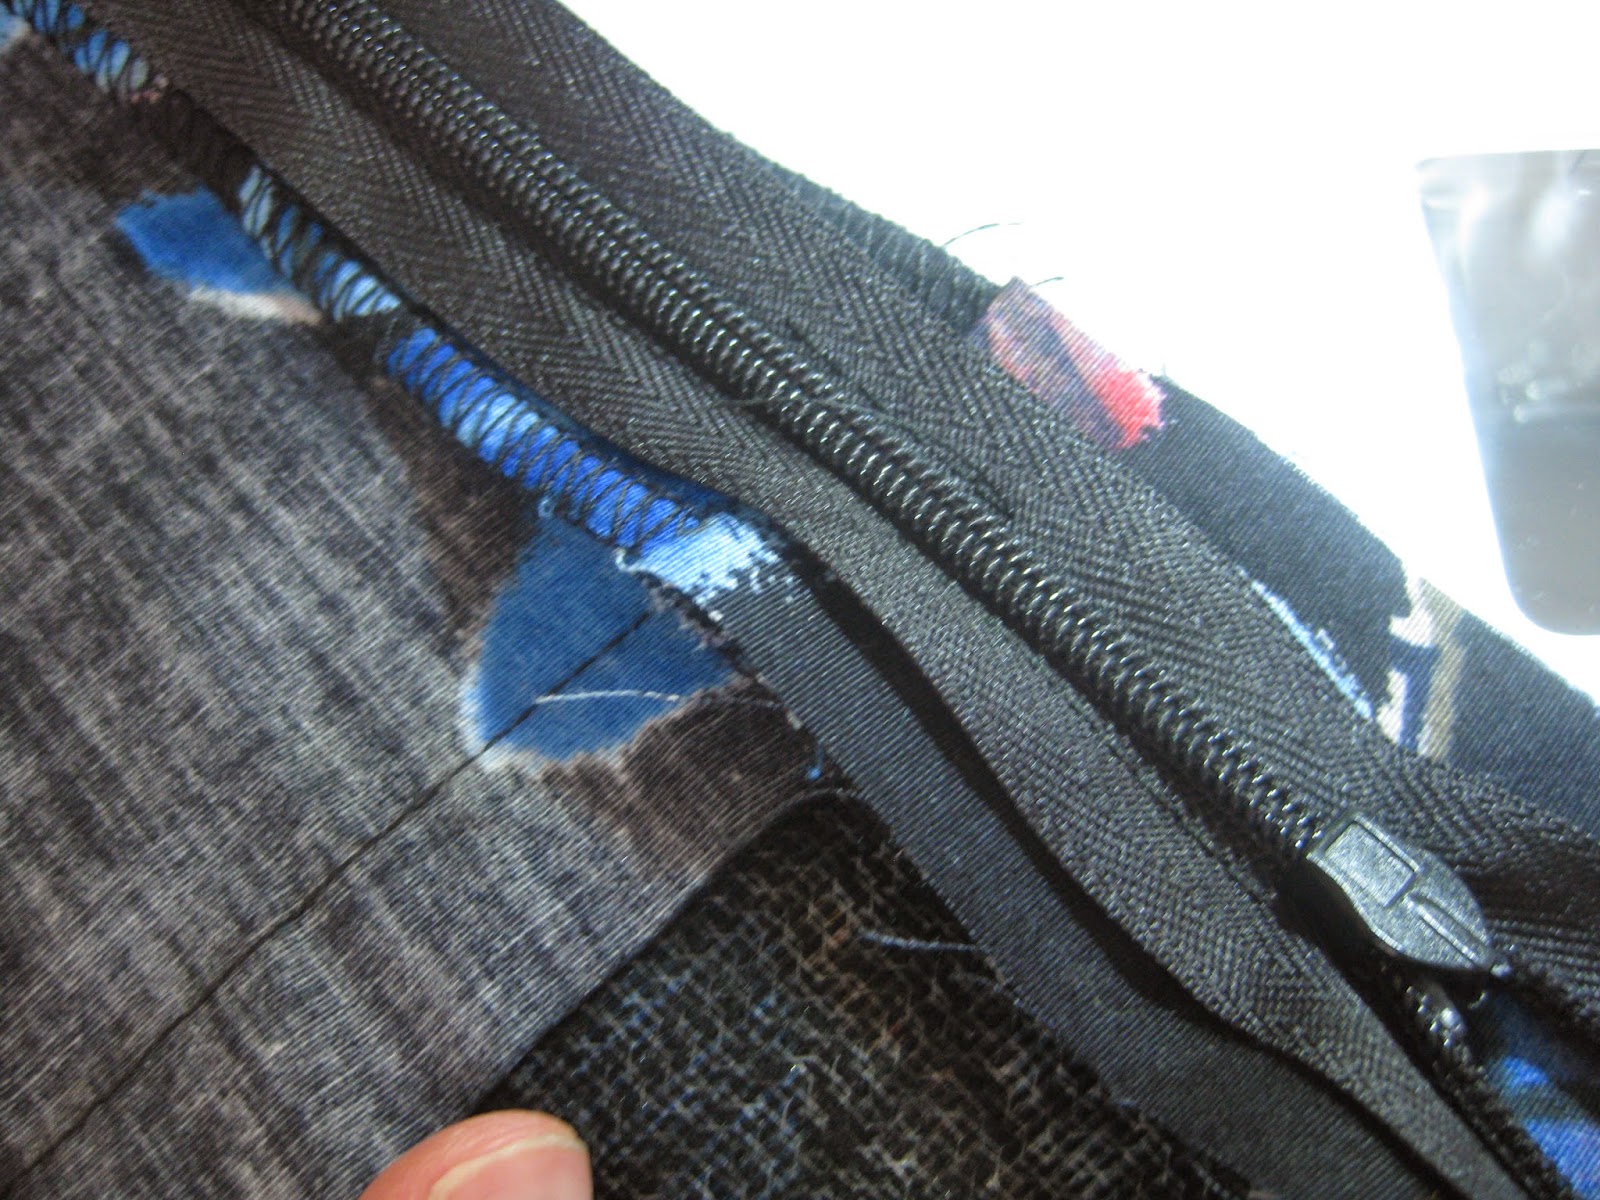 Check to make sure the two sides of the seam match.
 If they don't unpick and repeat until they do. Once the seam join is to your liking, baste the entire side of the zipper tape.
Step 5 - Turn the garment right side out to check the zipper placement. Seam joins should be aligned. If the CB seam is sewn, there should be no puckering at the base of the zipper.
 Don't worry about all the zipper tape that can be seen at this step. The final seams will be close to the zipper making it "invisible."
Step 6 - Now that the zipper has been basted into position we will go back and sew it down. Set your stitch length back to the 2.5 or the length you normally use. If you have an invisible zipper foot now is the time to install it on your machine. If using a regular zipper foot, than move your needle position over to the side the zipper tape will be on. (Needle position is the top bar. The normal position is 3, I've moved to to the left too.)
 Open the zipper and position one side of the zipper tape under your presser foot. If you have an invisible zipper foot, put the coil of the zipper into the foot's grove. Sew down the length of the zipper until you reach the zipper head. Back stitch well.
If you're using a regular zipper foot, use your finger to roll the tape open so that the needle will fall near the fold. Sew down the length of the zipper, rolling the zipper coil open as you go. Stop when you near the zipper head and back stitch well.

Step 7 - Repeat the process on the other side of the zipper tape.
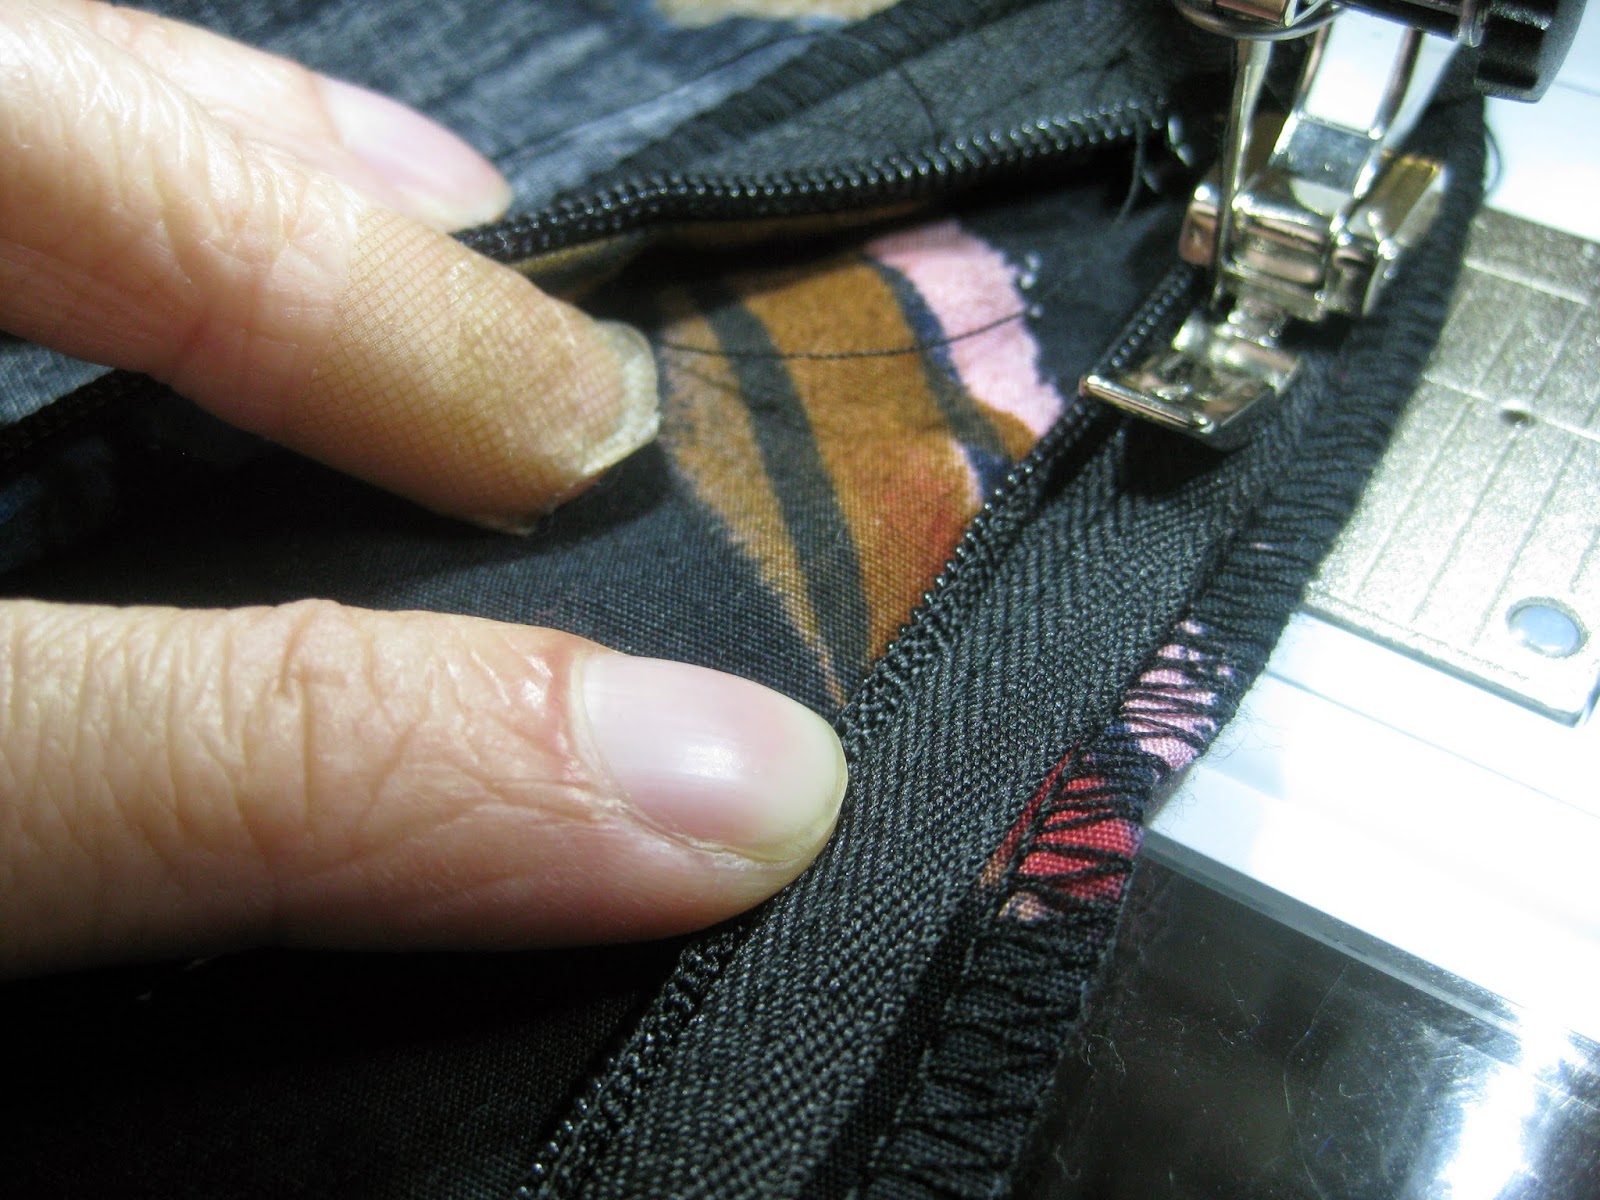
Step 8 - Zip up the zipper. If you were using an invisible zipper foot, than change back to a regular zipper foot. This is the time to sew the CB seam if it has not already been sewn. Pin the CB seam together, sandwiching the zipper tape between the two seam allowances. Pull the ends of the zipper tape out of the way so that they don't get caught in the seam.
 Stitch the CB seam up to the base of the zipper as far as the zipper foot allows you. If there is still a slight gap don't worry about it. You can always do a little hand sewing in that gap, rather than ripping your stitches and hair out.
Step 9 - Go back to the ends of the zipper tape and stitch them down to the seam allowances. Keep the zipper foot as close as possible to the coil since this area did not get stitched because the zipper head was there.

Step 10 - Turn the garment right side out and give it a good press. You should see no zipper tape sticking out of the seam.
 There will be a slight gap at the base of the zipper if you pull the seam apart.
 This is because the zipper head keeping the needle from getting close to the coil. The gap can be fixed with a few hand stitches if it irks you. If not just press the fabric well and the creases from the seam should disguise the area.
Step 11- Remove the basting stitches from the zipper tape to finish. Now you can attach any facings that may be needed.
Bonus Tip - Invisible zipper pulls can be painted with nail polish if you have trouble finding one that matches your fabric.

The tools you'll need are, an invisible zipper that matches your fabric, zipper foot and/or invisible zipper foot, fusible interfacing, pins and matching thread. If you do not own an invisible zipper foot don't worry. I'll be showing you how to get similar results with your regular zipper foot.
Step 1 - Fuse strips of interfacing to the wrong side of the garment where the zipper will be inserted. The fusible web will keep the fabric from stretching out of shape while you are sewing. Hand cutting 1/2" strips will does the job well. You can also buy a roll of pre-cut interfacing for tasks such as this.
Step 2 - We will be basting the zipper into position first. Place the closed zipper face down on the right side of the fabric. Check that the zipper is positioned at the correct seam allowance. Then pin into place. Tip - Butting the zipper tape up to the overlocked edge usually gives a perfect 5/8" seam allowance.
Step 3 - Install a regular zipper foot on your machine and set your machine to a basting stitch. Baste down the pinned side of the zipper tape.
Step 4 - Turn the garment inside out to prepare for sewing the other side of the zipper. Again, place the zipper face down on the right side of the fabric. Measure the correct seam allowance and pin into place. If a seam needs to be matched, then run a line of basting only over the seam area.
Step 5 - Turn the garment right side out to check the zipper placement. Seam joins should be aligned. If the CB seam is sewn, there should be no puckering at the base of the zipper.
Step 6 - Now that the zipper has been basted into position we will go back and sew it down. Set your stitch length back to the 2.5 or the length you normally use. If you have an invisible zipper foot now is the time to install it on your machine. If using a regular zipper foot, than move your needle position over to the side the zipper tape will be on. (Needle position is the top bar. The normal position is 3, I've moved to to the left too.)
If you're using a regular zipper foot, use your finger to roll the tape open so that the needle will fall near the fold. Sew down the length of the zipper, rolling the zipper coil open as you go. Stop when you near the zipper head and back stitch well.
Step 7 - Repeat the process on the other side of the zipper tape.
Step 8 - Zip up the zipper. If you were using an invisible zipper foot, than change back to a regular zipper foot. This is the time to sew the CB seam if it has not already been sewn. Pin the CB seam together, sandwiching the zipper tape between the two seam allowances. Pull the ends of the zipper tape out of the way so that they don't get caught in the seam.
Step 9 - Go back to the ends of the zipper tape and stitch them down to the seam allowances. Keep the zipper foot as close as possible to the coil since this area did not get stitched because the zipper head was there.
Step 10 - Turn the garment right side out and give it a good press. You should see no zipper tape sticking out of the seam.
Step 11- Remove the basting stitches from the zipper tape to finish. Now you can attach any facings that may be needed.
Bonus Tip - Invisible zipper pulls can be painted with nail polish if you have trouble finding one that matches your fabric.
Happy sewing!
Heather


