Hello Bluegingerdolls, I'm currently in a bit of a sundress making phase and keep looking for ways to hack my favorite patterns into strappy confections. At the beginning of the summer I spied a RTW dress that reminded me of the Billie Jean pattern. It had a full skirt and a princess line seamed bodice, but with spaghetti straps. What I really liked about the dress was that it was made with two different fabrics and had a faux waistband. The whole "dress that looks like separates" look really tickled my fancy.
As luck would have it, Marcy Tilton stocked two black/white polka dot cotton shirtings that were the reverse of each other. The perfect fabric for my hacking idea! So I got out my Billie Jean pattern and created the sundress/mock separates version.

 Modifying Billie Jean into a sundress turned out to be a straight forward process. I cut off the sleeve area and fashioned myself a few spaghetti straps. After sewing together the bodice, a simple waistband rectangle was drafted and tacked it to the waist seam. The skirt portion of the pattern was not modified in any way. I sewed it up according to the directions and attached it to my faux waistband and bodice.

So I have I hooked you with the sundress version yet? If so then you're in luck. The hacking steps can be finished in about 30 minutes or so. I've also added a few sewing directions below the hacking steps so you'll know how I put the dress together.
How to Modify the Billie Jean Bodice
I'd recommend making any fitting changes you need before hacking the pattern into a sundress.
Step 1. Start with the front bodice pieces. The side front needs no changes and can be placed to the side.

Step 2. On the center front, place the ruler at the top of the princess seam. Use the angle made by the top of the seam allowance as a guide.

Step 3. Draw a line across the entire shoulder.

Step 4. From the neckline side, place a mark 3/4" in on the line you just drew.

Step 5. Use the mark as a guideline to draw a new neckline with a french curve.

Step 6. Cut off the excess paper. Your new front bodice pieces should look like this.

Step 7. Now we will modify the back bodice pieces.

Step 8. Start with the side back pattern piece. Draw a horizontal line across the pattern at top of the side seam. Make sure the new line is perpendicular to the grain line.

Step 9. Place the center back piece on top of the side back piece like you were going to sew them together. Match the princess line seam edges together until you reach the newly drawn line. Mark the position of the side back line on the center back piece. This will keep both pattern pieces the same height so that they sew together after being altered.

Step 10. Draw a horizontal line across the center back at the marked point.

Step 11. Cut the upper portions of the patterns off on both pieces.

Step 12. Finally we want to straighten out the bit of the armhole princess line seam that remains after cutting the pattern pieces down.

Step 13. On the center back, use the bottom part of the seam line as a guide to straighten the seam line. Cut off the extra bit at the top.


Step 14. On the side front, tape a little extra paper to the top part of the seam line so that the seam line can be added too. Again use the bottom part of the seam line as a guide for the angle.


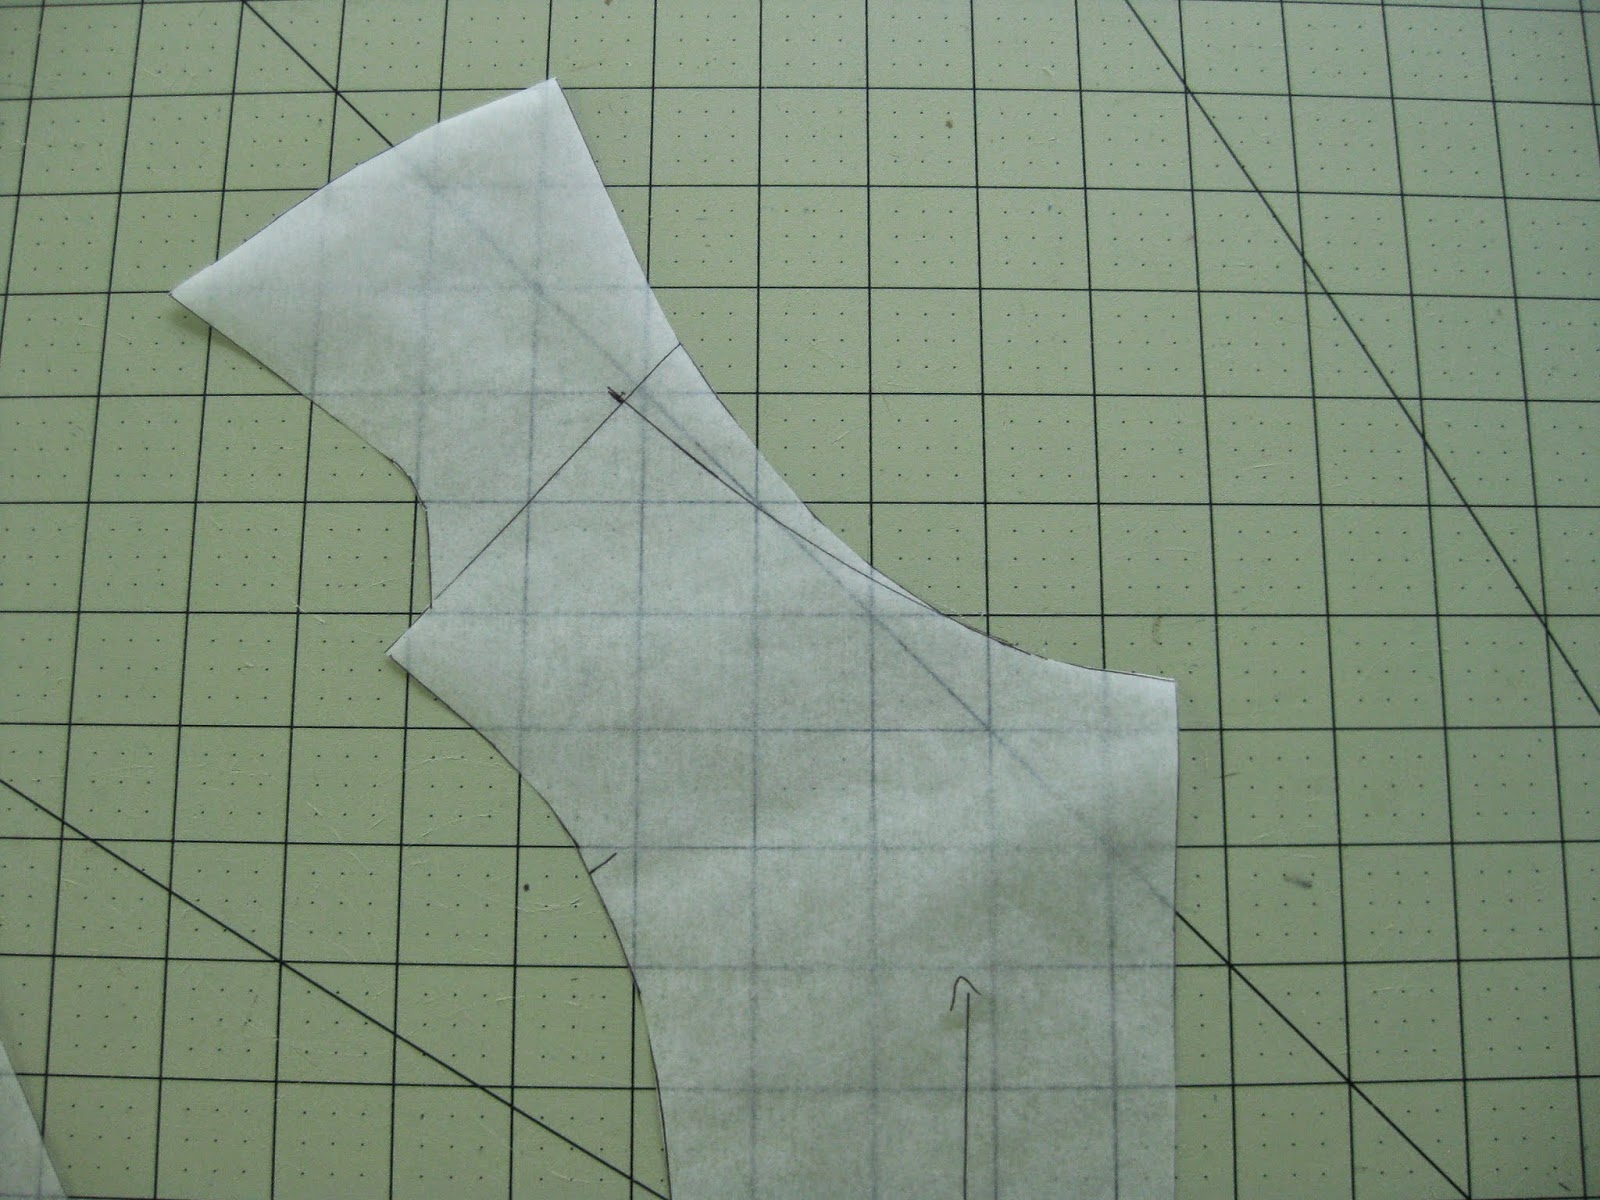
Step 15. The finished back pattern pieces look like this.

Step 16. You'll need to draft a rectangle for your faux waistband. The length should be the same as the diameter of your bodice waist seam. The width should be 5 1/8".

Optional Step 17. For this look you'll want the waistline seam to hit at your natural waist. Depending on your figure you may need to lengthen the bodice on the lengthen/shorten line. I lengthen my pattern 1.5".
Some Sewing Directions
1. You'll need to make 4 spaghetti straps for the bodice. I cut 4 bias strips at 1.5" wide and used the BHL tutorial for sewing and turning them.
2. Just like the original Billie Jean bodice, this one is fully lined. Cut out the bodice pieces in both self fabric and lining. On the front the spaghetti straps get basted into the "point" of the bodice and on the back they get basted on the side back/center back seam line. Sandwich the spaghetti straps between the lining and self at those points and stitch the self and lining together at the neckline.

3. Before attaching the waistband, it's a good idea to fuse a little light weight interfacing onto the piece so that it doesn't crumple. After fusing, fold the waistband in half and baste it to the bottom of the self bodice. Make sure not to catch the lining at this point.

4. Sew together the Billie Jean skirt as normal and attach it to the bottom of the self bodice. You'll be sewing through the extra layers of the waistband as well. Make your stitch length a bit longer and go slow.
5. Insert a zipper as normal, but make sure to catch the raw edges of the waistband in the zipper. Because of the extra layers you'll need to trim down the bulk around this area as much as possible.
6. Now you can go back and sew down the lining around the zipper and at the waist seams. Hem your dress and you're ready to strut your stuff.

As luck would have it, Marcy Tilton stocked two black/white polka dot cotton shirtings that were the reverse of each other. The perfect fabric for my hacking idea! So I got out my Billie Jean pattern and created the sundress/mock separates version.
I really love this version of the pattern. It looks pretty by it's self or under a cute cardigan. I even got the ultimate sewing validation, the complete stranger complement. Hooray!
So I have I hooked you with the sundress version yet? If so then you're in luck. The hacking steps can be finished in about 30 minutes or so. I've also added a few sewing directions below the hacking steps so you'll know how I put the dress together.
How to Modify the Billie Jean Bodice
I'd recommend making any fitting changes you need before hacking the pattern into a sundress.
Step 1. Start with the front bodice pieces. The side front needs no changes and can be placed to the side.
Step 2. On the center front, place the ruler at the top of the princess seam. Use the angle made by the top of the seam allowance as a guide.
Step 3. Draw a line across the entire shoulder.
Step 4. From the neckline side, place a mark 3/4" in on the line you just drew.
Step 5. Use the mark as a guideline to draw a new neckline with a french curve.
Step 6. Cut off the excess paper. Your new front bodice pieces should look like this.
Step 7. Now we will modify the back bodice pieces.
Step 8. Start with the side back pattern piece. Draw a horizontal line across the pattern at top of the side seam. Make sure the new line is perpendicular to the grain line.
Step 9. Place the center back piece on top of the side back piece like you were going to sew them together. Match the princess line seam edges together until you reach the newly drawn line. Mark the position of the side back line on the center back piece. This will keep both pattern pieces the same height so that they sew together after being altered.
Step 10. Draw a horizontal line across the center back at the marked point.
Step 11. Cut the upper portions of the patterns off on both pieces.
Step 12. Finally we want to straighten out the bit of the armhole princess line seam that remains after cutting the pattern pieces down.
Step 13. On the center back, use the bottom part of the seam line as a guide to straighten the seam line. Cut off the extra bit at the top.
Step 14. On the side front, tape a little extra paper to the top part of the seam line so that the seam line can be added too. Again use the bottom part of the seam line as a guide for the angle.
Step 15. The finished back pattern pieces look like this.
Step 16. You'll need to draft a rectangle for your faux waistband. The length should be the same as the diameter of your bodice waist seam. The width should be 5 1/8".
Optional Step 17. For this look you'll want the waistline seam to hit at your natural waist. Depending on your figure you may need to lengthen the bodice on the lengthen/shorten line. I lengthen my pattern 1.5".
Some Sewing Directions
1. You'll need to make 4 spaghetti straps for the bodice. I cut 4 bias strips at 1.5" wide and used the BHL tutorial for sewing and turning them.
2. Just like the original Billie Jean bodice, this one is fully lined. Cut out the bodice pieces in both self fabric and lining. On the front the spaghetti straps get basted into the "point" of the bodice and on the back they get basted on the side back/center back seam line. Sandwich the spaghetti straps between the lining and self at those points and stitch the self and lining together at the neckline.
3. Before attaching the waistband, it's a good idea to fuse a little light weight interfacing onto the piece so that it doesn't crumple. After fusing, fold the waistband in half and baste it to the bottom of the self bodice. Make sure not to catch the lining at this point.
4. Sew together the Billie Jean skirt as normal and attach it to the bottom of the self bodice. You'll be sewing through the extra layers of the waistband as well. Make your stitch length a bit longer and go slow.
5. Insert a zipper as normal, but make sure to catch the raw edges of the waistband in the zipper. Because of the extra layers you'll need to trim down the bulk around this area as much as possible.
6. Now you can go back and sew down the lining around the zipper and at the waist seams. Hem your dress and you're ready to strut your stuff.
No comments
Post a Comment
Thank you so much for the visit and leaving a comment!
I totally appreciate them all!
Happy sewing!
Abby
x