Friday, 21 February 2014

Peggy Pegged

Hello there Gingerdolls, Heather here. Today I have a fun little pattern variation for you, it's Peggy Pegged.


So what exactly do I mean by that?  Well instead of using the A-line shape Peggy is drafted with, I changed the side seam shape to that of a pencil skirt.  The waistband and pocket details remain the same, but the skirt gets a more figure hugging shape. My version was sewn in a light weight stretch denim which allowed me to skip any need for a vent in the back.


To do this hack I used the Billie Jean pencil skirt pattern as a guide.  Other pencil skirt patterns can be used, you'll just have to eyeball how to line up the pieces more.  Now on to the nitty, gitty of cutting up your pattern. Grab those scissors, a pencil and your Peggy and Billie Jean patterns and we'll get cooking.

How to convert Peggy to a pencil skirt shape.
1. We'll start with the Back Skirt since the change is rather simple. First line the Billie Jean skirt on top of Peggy so that the top side seam points are touching and so that the CB lines are parallel.

2. Trace the side seam line of Billie Jean onto Peggy.


 3. Cut off the excess paper and your back skirt alteration is finished.


4. Now we will alter the Front Skirt.  First you will want to fold the pleat closed, as if you were sewing it, and pin it there.


5. Just like on the back, you'll want to line the Billie Jean skirt up with Peggy so that the top side seam points are touching and so that the CF lines are parallel. With the pleat there might be a little fudging with the CF's matching Just do your best.


6. Trace the Billie Jean Side seam onto Peggy and cut the excess paper off. Now that both side seams have been adjusted, place the front and back skirt patterns on top of each other and check that both side seams are the same length. Add or subtract to the side seams to make them match if they don't.


7. You'll need to adjust the pocket facings and bags for the new side seam shape. Let's start with the Pocket Facing Piece.  Lay it on top of the Front Skirt, matching it up with the straight edge of the pocket.


8. Trace the new side seam off the Front Skirt and trim the Pocket Facing.


9.  Now you'll use the Pocket facing to alter the pocket bag.  Since the pocket bag is smaller to create the gapping pocket feature you'll need to use the notch on the bottom of the bag to line them up.  Also match the top side seam point.


10. Again trace the new side seam onto the pocket bag and cut it off.  When the two pieces are adjusted they should still have a size difference to keep the gapping pocket feature. It should look something like this.


*Optional Alteration*  To exactly copy my Peggy you'll need to shorten the skirt by 4 inches.  Use the CF/CB as your guide to square a line across the pattern and cut off the extra length. My skirt has a 1 1/4" hem making the final length 22".


To sew up just follow the regular directions.  Your pocket sides will be a bit fiddly to seam at this width, but the finished skirt will look great.


P.S. I just have to crow a bit because this is my first lapped zipper!  I used the tutorial on the blog and am pretty pleased with the end result. Hooray for learning new sewing techniques!


Enjoy!
SHARE:

Wednesday, 19 February 2014

The Peggy skirt - The beginners pattern


I spied this Peggy skirt sewn up by Malin from her blog Oh my green darling!  and i  fell in love with straight away i mean its a navy corduroy fabric, i love me some cordouroy! Who doesn't? And whats even better is that Malin has only been sewing for a couple of months! I'm like your kidding right? I read her email  again just to make sure i read it right, Yep... a couple of months,  a complete, total beginner tackled  the Peggy skirt and won big time! Mind you, the Peggy skirt is a  beginner pattern, but my god it nearly brought a tear to my eye to see basically a complete total sewing newbie  sewing up the pattern. It made me think of myself and my sewing skills  a couple of months into taking up a sewing  and i can tell you now,  if i had sewn up a Peggy skirt after a couple of months of sewing it wouldn't have looked like Malin's Peggy skirt hahhahahaha hilarious stuff!

For me this is what pattern designing  is all about,  all the proofing, testing reading and re-reading the instructions, going insane, testers testing to make sure everything is super clear and that sewing up a Bluegingerdoll pattern puts smiles on faces and doesn't give 'throw your sewing machine out the window' tanties  ( We've all had them right haha!?). I'm so proud of Malin and her Peggy skirt and i hope this gives beginners out there a kick up the bum that they can tackle the pattern too, yeah! 

So before i get all emotional over here, here is  Malin with her take on sewing up the Peggy skirt.


What type of fabric did you use? What inspired your choice of fabric?

I choose navy blue Corduroy, with really thin stripes, almost baby cord. In September -13 i went to Scotland on a job trip and fell in love all over again in the typical brittish fabrics. So when i came home i wanted to sew i wool and Corduroy. I thought The Peggy skirt would be perfect in corduroy since i wanted some "stiffness" in the skirt. It also fits the cold Swedish winter weather as a hand in the glove.


 Did your  Peggy skirt   live up to the image you had in your mind?


Yes it did! I love the retro look and this one looks retro but still has an contemporary look.
So i works perfect at the office and perfect at home.


 How did you decide to reflect your personal style in the pattern?


By using the anchor buttons. I guess i wanted the sailor look in a winter way ( it always easier to make summer clothing with that feeling).  


Tell us a bit about your making process, any tweaks you made? 

At first i made a size twelve, but it was to big at the waist so i took the waist band of and managed to make a hole in the fabric (close to the left pocket). I took some inch of by making wider darts in the back and wider front pleats, so the side seams still would be on the side of the hips.  When i sew it all together it worked out fine. It wasn´t until when i took these photos of the skirt that i realised that the waist band isn't straight due to covering up for the hole near the pocket. I also shortened it a bit.


What thoughts do you have about the project? 

I thought it would be more advanced than it actually was. When i made this one in October i had  only been sewing for a few months but wanted something really nice. And since i love the retro look the  Peggy skirt was the one. I was to lazy to do a muslin, so i traced the pattern and cut the fabric. At first i was a bit nervous for the pocket part, but it was so easy. I think the pocket detail is one of the best things. Now after i´v been sewing some more skirts i must say that the way you put together the waistband is so smart and good looking. Well it got together easy and quicker than i thought. I guess hand sewing the buttons took the longest time :)


Are you planning any future Peggy skirts?

Yes!  I've  already bought some chambray to make a summer Peggy. I also think i´ll try to put a lining in that one. 


Thanks Malin! And if you have sewn up a Bluegingerdoll pattern and want to show it off here on the blog then give me a yell at abby@bluegingerdoll.com, or upload them to the Flickr group  i would love to see it!


Abby
x
SHARE:

Monday, 3 February 2014

A Wool Peggy skirt...

Image


The lovely Melanie from her blog, Theseedsof3  has kindly taken the time out to answer a few questions about her wool Peggy skirt.  I am totally drooling over Melanie' Peggy skirt, I can't wait to sew myself  a similar one  when winter comes around again. The heatwave here lately  has me day dreaming ( Or i may be possibly delirious from the heat)  about the  cooler days, woolen coziness, scarfs, comfort food  and all the sewing projects i hope to sew up for myself . I love summer but at this point in time,  43 degree days is cause for crazy town and totally  don't lead to any productivity at all with anything, especially with sewing! 


So take it away Melanie, i'm off to dream deliriously about wool fabric :)


What type of fabric did you use? What inspired your choice of fabric?

I used a foresty emeraldy muted green wool blend. It was a fantastic choice, a nice neutral color to go with any top I want, but warm and snuggly with tights for the colder months. 
I really wanted some green Harris tweed, but, that's hard to come by in my neck of the woods. I wanted a classy fabric that was neutral (for my wardrobe) so I can mix and match it with all my tops. Sewing Peggy was my first step toward building a ensemble wardrobe.


Image


Did your  Peggy skirt   live up to the image you had in your mind?

Yes, yes, and YES! She is super fab! Those pockets, that waistband, oh, oooooh, tab buttons on the sides, squeeeee! I had been wanting to 1) make a high waisted skirt, 2) try a lapped zipper, 3) make something with waistband tabs, and 4) make more neutral separates for my wardrobe. Peggy checked ALL of them off with a smile!


Image

How did you decide to reflect your personal style in the pattern?

Well, she already reflected my personal style pretty well, so I didn't do any hacking or major alterations. I decided to go with the straight waistband this run through, but I will probably go with the curved one next. 
I played it safe with buttons on this one since the wool was hard to coordinate with buttons that didn't get lost. Next time, I will add a POP of color for buttons, and maybe pocket linings, especially since they gape a little and you can see inside them a teeny bit.

Image 

Tell us a bit about your making process, any tweaks you made?
  • I chose view A, the straight waistband with the cute button tabs
  • I cut a 16 waist and graded to an 18 hips.
  • I cut size 18 button tabs to give them the most visual impact possible
  • I added 2″ of length to the center back and graded to 0 at the side seams to help cover my ample backside

  • Image


 What thoughts do you have about the project?

I totally love this skirt. It is the skirt I was dreaming about in my mind and now I have it.

 I have some khaki poplin that I WAS going to make a different skirt with, but now it is in my Peggy Box :-) I will probably end up with a black/navy/gray one too (whatever I decide for "basic neutral"), but ALL with have button tabs and fantastic buttons.


Image


Are you planning any future Peggy skirts?
Oh , yes, see above :-)


Thanks Melanie! 

If you have the time definitely go and check out Melanie's blog Theseedsof3  and get all inspired up over there!

Oh yeah, you may or may not have noticed a slight change on the blog here, i took the time to schmancy the old place a bit, make it easier to navigate and find stuff  and just make it  heaps better! 

I hope you like it  and if you have any thoughts on things you would like to see on the blog, tutorials etc then just let me know!

Abby
x


SHARE:

Tuesday, 10 December 2013

A perfect Miss Peggy x 2...


Wowee have i got a gem of post  for you today! A little inspiration  to warm your already over excited sewing heart... 

Introducing Mary, from her blog Idle Fancy. Mary was my very first  customer to buy the Peggy skirt. I'm talking pressing that purchase button within a nano second of me releasing the pattern to the world! This initial sale made me relax a little and validated the fact  that the Peggy skirt pattern was most probably going to do OK out there in the sewing world, at least someone liked the pattern!  So massive thanks Mary :)

I asked Mary to give me low down on her 2 fab Peggy skirts, which are sewn up in cotton poplin and a gorgeous wool blend fabric. Not only Mary stitched up 2 amazeballs Peggy skirts, she  has also gone and done a really in depth review of the Peggy skirt pattern, i mean she has skinned it clean, opened it up for all to see, straight from the horses mouth, straight shooter stuff.. you get the drift. And an FYI,  this review of the pattern is totally ALL Mary's opinion, nothing to do with me. 
I just think giving you peeps a heads up about a reviews of  Bluegingerdoll patterns that are out there,  is a great way for all who are sitting on the fence about the Peggy skirt pattern or any other Bluegingerdoll patterns so you can get a review from another sewist just like you, not me the pattern designer who albeit tries really hard to be transparent and very open with all my patterns, but obviously  in the end i guess i am always going to be slightly bias about them... cause i think they're all cool as shit! Hahaha :)

OK enough from me, take it away Mary!


What type of fabric did you use? What inspired your choice of fabric?

For my first Peggy, I used a red cotton poplin with white pin dots. Because of the classic, retro look of the Peggy, I really wanted to use a fabric that fit the vibe of the pattern. Luckily, I had just enough of these tiny dots left over from a wearable dress muslin to make  out a Peggy. 


Did your  Peggy skirt   live up to the image you had in your mind?

It was even better! With high-waisted skirts, I get a little nervous about how they'll sit over my hips, but the finished Peggy fits beautifully. I absolutely love how the pocket design turned out and the waist placement is so flattering. Best skirt ever! 


How did you decide to reflect your personal style in the pattern?

Most of my wardrobe is made up of modern takes on retro styles and this Peggy fits in perfectly with that aesthetic. The pin dots are a more subtle take on the classic polka dot, which I love, and the design itself pairs wonderfully with my winter uniform of tights & boots. Even better, with heels and a fitted sweater it will dress up perfectly for a little retro flair at upcoming holiday parties! 


What thoughts do you have about the project? 

The Peggy skirt is, hands down, my new favourite skirt pattern. It's such a versatile piece, easily skewing either casual or dressy, depending on what fabric is used, and has such thoughtful design details. The pockets seem simple, but they add just the right amount of visual interest to the skirt front. Honestly, I can't rave enough about this pattern! I'm in love. 


Tell us a bit about your making process, any tweaks you made? 


For the most part, I followed Abby's instructions and process to a tee, taking just a few small adjustments here or there. Fit wise, I took in the waistband by about three inches, to compensate for my exaggerated hourglass figure, then took a very large hem (five inches!) to make the Peggy stop just at my knees. The only other thing I did was omit the adorable waistband tabs, because I was sadly pressed for time. 


Are you planning any future Peggy skirts?

Yes, definitely! I actually just finished my second one, made up in a black, cream, & pink wool plaid, and am already plotting a lip-shaped waistband version to sew up this weekend. Since she's such a versatile, comfortable skirt pattern, I probably won't stop making Peggy' any time soon!


Now go and read more about Mary's Peggy skirt addiction on her blog and her review of the Peggy skirt and all the over cool stuff she has sewn up. Before you go though,  check out a few more eye candy pics below of the Peggy skirts  from Mary's blog. Remember if you have stitched up a Bluegingerdoll pattern then get in touch and share it with us!

Also the Peggy skirt is NOW is also available as a PDF pattern as well as the paper pattern, so there is no excuse for not grabbing a copy for yourself! Grab it here, all you fence sitters :)


Abby
xx


SHARE:

Monday, 9 December 2013

The Peggy skirt is now available as a PDF!


Woohoo i've got some awesome news!  The Peggy skirt is NOW available as an easy peasy downloadable PDF pattern, alongside the  MAE and Stella PDF patterns. They're all  are available  at a super reasonable wallet friendly price which is an added bonus as well as being ready immediately for download so you can get sewing straight away.  I am still working on a copy shop print out version of each of the patterns as well converting the Billie Jean pattern to a PDF, so hang ten on those just for a little bit longer :)

Head on over to the WEBSITE or ETSY and download your Peggy skirt PDF pattern and  even pick up a copy of the MAE & STELLA PDF patterns as well, while you're there :) 

For the peeps that aren't into PDF patterns all the patterns are still ( and always will be) available as pretty paper patterns. 

Stay tuned folks i have some awesome surprises coming up before the year is out!

Enjoy!
Abby
x
SHARE:

Wednesday, 27 November 2013

Peggy skirt Mania!

peggy1


Ahhh! Check out these two gorgeous Peggy skirts that have popped in the wild, love em!

The divine yellow Peggy is by Crystal, blog: Crystal Pleats. I think i need a yellow Peggy in my life!

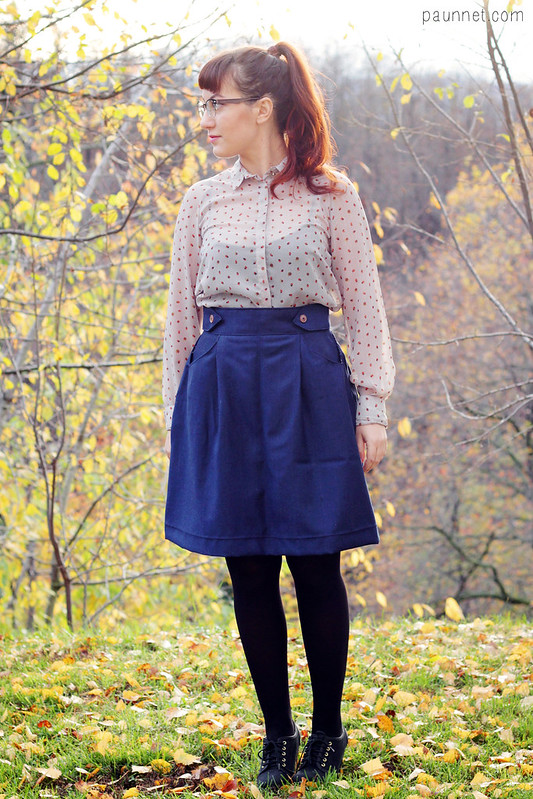
The cute navy blue stunner is from Anna, blog: Paunnet, who is also currently holding a giveaway on her blog to win yourself a copy of the Peggy skirt pattern!! So head on over for the details on how to enter.

Before you go though, enjoy these two awesome Peggy skirts!!

You can also find out all the nitty gritty details about sewing up the Peggy skirt from these two gals on their blogs, woo!


IMG_1097


IMG_1098

If you have also sewn up a Bluegingedoll pattern, i wanna see! Just upload them to the Flickr group and inspire us  all or just a sticky beak at all the cool stuff being sewn up!


Abby
x


SHARE:

Sunday, 17 November 2013

Peggy & Meg


The Peggy skirt sew-along wrapped on Friday and it was such fun! I really enjoy having sew-along's for each pattern and i hope you do too! Thank you to all that participated, i hope you created an amazing Peggy skirt that you love wearing. 

Even though the sew-along has finished it doesn't mean the party has to stop! Right?
 I think it is only fitting to share some sewing eye candy with you on this fine weekend.

Check out this amazing Peggy skirt from Meg, who is also one of my fabulous pattern testers. 

Enjoy!
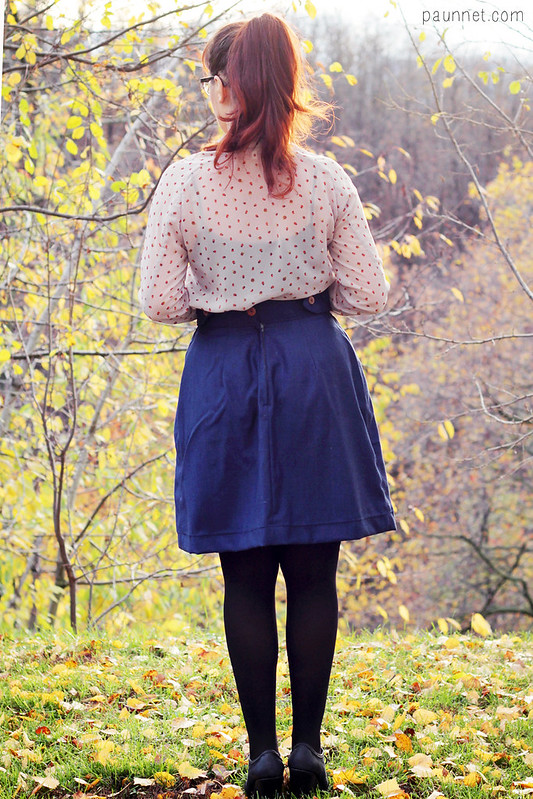


You can find out all the details over on Meg's blog Made by Meg.

Hope you're enjoying your weekend, and don't forget tomorrow the newest pattern will be released, exciting! I can't wait to show you all :)

Abby
xx

SHARE:
© Bluegingerdoll - Vintage inspired sewing patterns, sewing tips and tricks | All rights reserved.
Blogger Template Created by pipdig